Making moulds out of clay for objects is annoyingly poorly described. No doubt each master had his own specific recipes; these would probably vary by geography given the availability of local ingredients. Biringuccio, in his “Pirotechnia”, from 1540, is quite specific about all this. He says:
“There are many kinds and varieties of earth that are used for the loam compositions for making the moulds for casting bronze, brass, or other metals. Since this is a very necessary thing, you must try to have the best kind and one that resists the fire well. It must be disposed to receive the metals well, must make a neat casting, and must not shrink or break with cracks on drying or baking. Aside from actual trial, I believe that there is little that can help you, since the clay in itself has no colour or visible sign that I know of to show how satisfactory it is.”
Or in other words, whether it is red, or yellow, or brown, it is not clear as to exactly what kind of clay you should use, but the final product will be obviously good or bad. Difficulties of knowing exactly what to use are compounded by the fact that there is a translators note at the bottom of the page:
“Terra this word was used for earthy materials in general as well as specifically for clay such as used in moulding. We have used either earth or clay as seemed best fitted to the context.”
Or in other words, is Biringuccio talking about earth with much organic material in it, or just for clay? How much sand is in it? Further on he talks about using wool cloth clippings, wool cardings, and sand, iron scale, crushed brick, horse or donkey dung and a variety of other materials. All of these would add some strength to the clay, assuming we are talking about pure clay here. This pure clay would have to be smooth and lacking in lumps and bits of stone, in order to avoid voids and weak spots in the mould. This is easy for me to get nowadays, but much harder for people in the past. Also Biringuccio says it should not be unctuous or lean, characteristics that are somewhat unclear in the context of a book. Perhaps with samples in front of me they would make perfect sense. Also, he appears not to like the use of pure clay, saying “In conclusions, with the exception of pure clay (which is too viscous and tenacious), any other earth, if free from pebbles, could easily serve you by tempering it with others, or if it should have pebbles, by separating them out.”
Biringuccio was greatly enamoured of wool clippings for helping the clay stay good and strong. They would act like a composite, giving greater strength through having these small fibres running through the clay. But there is nothing about how long they would be. I suspect they would be a few mm, but it is not clear. So I shall have to experiment.
I cut up some wool I gathered from fences and ended up with fibres 2 or 3mm long. Together with fine grained sand from the local sandpit, and and buff clay, with a bit of charcoal and some of the strange ashes you get from charcoal briquettes. (Charcoal briquettes are rubbish for my purposes, since they do not burn fast enough.) I have no idea if anything is special about buff clay, but it seems to work, and some googling suggests it is good for modelling etc.
Clay is sticky stuff when wet. I had trouble getting it to stop sticking to my fingers, next time I shall use much dryer clay. Again, from the old books it is not clear how wet it should be. I managed to make two kinds of mould for thimbles. The first, is made of two parts. The aim was to have a top, with a lump sticking down from it to fill in the hollow in the bottom part. This kind of worked, but I forgot to put in the pouring holes so shall have to drill them out. The second kind was made of a hollow, with a lump placed into the middle of it. The aim was to mimic medieval thimbles. The earlier kind, that the second mould is made for, had a hole in the top. Now, I have yet to find any mention of why this is, but the easiest way I can think of making a thimble with a hole in the top is by making a mould like I have done. Since the centre of the thimble has to be there to ensure it is a ring of metal, it seemed easiest to have a piece of clay running through that point.
Earlier thimble with hole in top (14th C or so):
Eraly medieval thimble
Later medieval thimble, more like today’s (15th century):
Later medieval thimble
My moulds:
The first mould
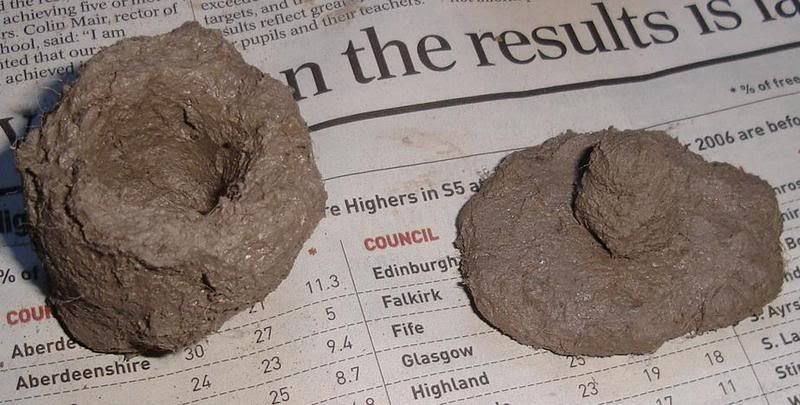
The second mould:
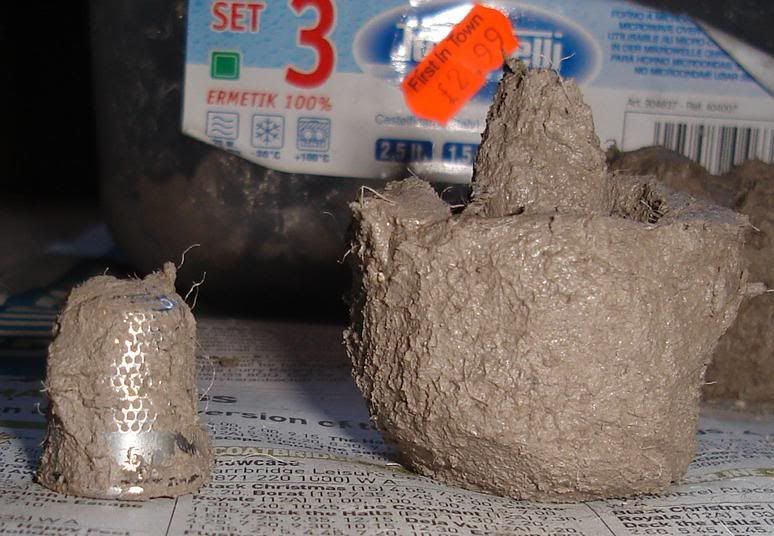
There is a thimble beside it for comparison.
Now, I dried these moulds in a warm but not hot oven for an hour or two, then ramped up the temperature to over 100C for an hour. They were then fired to something towards 600C in this set up:
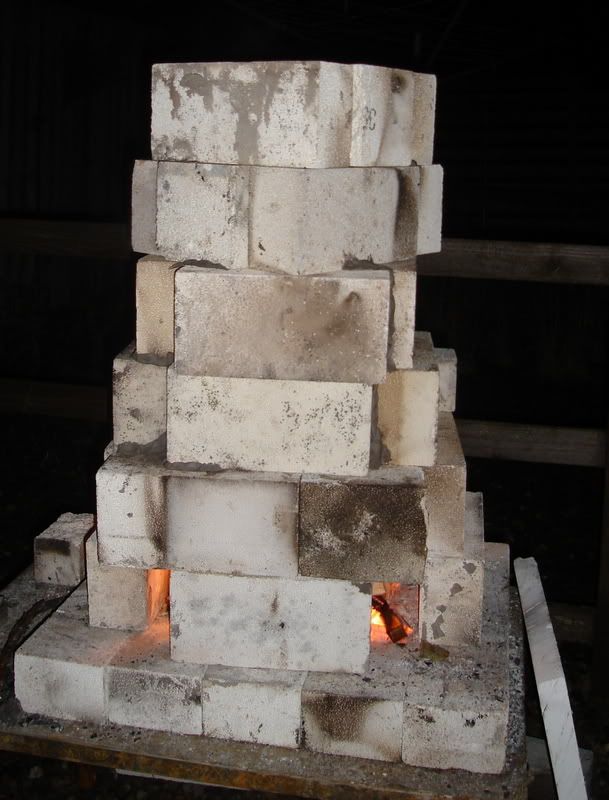
I was experimenting with chimneys, so built it high. The gaps at the side had some clay on them, to seal it off a bit better to ensure that it worked as chimney. Maybe I made it close in too much at the top, but it didn’t work quite as well as last time. Part of the problem was that I was using wood that wasn’t quite dry enough, and was quite green. So it didn’t take off too well. But the thermocouple registered just over 800C in the embers when it was going properly. For the chimney effect to work properly I need a good lot of heat at the bottom, to heat air and provide combustion gases, thus pulling more air in at the bottom. You end up with lots of air getting to the fire for no other reason than the fire itself. From the description of a similar set up in Theophilus, mine was not good enough, it should be able to reach a temperature of over 900, which is what is needed for making brass.
They came out fine, looking like this:
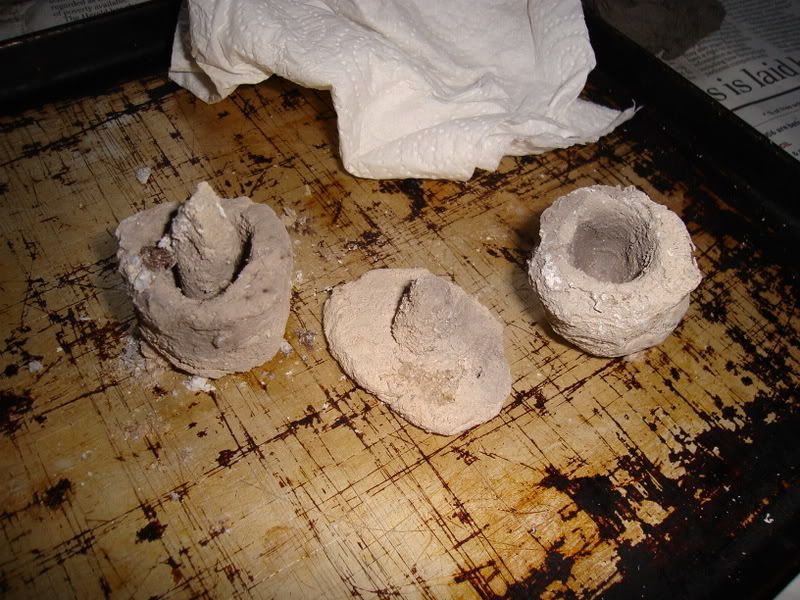
No cracking apparent. I shall still put them in the furnace at over 1000 when I’m melting the copper, just to make sure that they are properly fired.
After I’d made my clay moulds, I found a comment in the journal of the Historical metallurgy society, 30/2, 1996, page 112, saying that the mould material they had found on an archeological dig was clay tempered by organic matter. Yes, great, but what kind of organic matter? I shall probably have to try leaves, potting compost, and plain old earth.
It is likely that there are some people out there doing this using nearly authentic techniques, but half the fun of this is working it out for myself, and at the end I shall have a much better idea of what makes things work well when doing historical metallurgy.
Update on my Spanish Green experiment- after 2 days, the copper in the vinegar solution has not turned green, but the copper above it has done so. This suggests that the main reason it will turn green is reaction with acetic acid vapour. Copper acetate being the result. So for larger scale production, it shall be necessary to merely heat vinegar gently, with copper suspended above it. Why didn’t they use this method then?
No comments:
Post a Comment